

Setting to zero
Digital ruler with a motorized stop
Setting to zero
Setting to zero basic
Setting to zero with a marker
Fine setting
Simple, Fast, Exact…
This video allows you to follow the necessary steps to the setting to zero an EXACTLENGTH PRO ruler.
Before using your EXACTLENGTH PRO ruler, it is important to read the "General Safety Warnings" section found on page 3 of the user guide included with the product. This complete manual can also be viewed or downloaded directly from our website at www.exactlenght.com. All the instructions required to set to zero and using your EXACTLENGTH PRO ruler presented in this video, can be found more exhaustively in the user guide.
The setting to zero is to determine the exact location of the blade against the stop of the saw and attribute the Zero measure (ex: 0 inches). There are two procedures to set to zero depending on if your installation requires or a marker or not.
The first procedure is the basic set to zero. It will be carried out when your stop, once adjusted, travels to the blade. On the other hand, if the stop does not meet the blade, the set to zero with a marker procedure must be carried out. This second procedure will allow to calculate the distance between the blade and stop using a marker of precise length. It will also maximize the displacement of ruler by adjusting the limits of its extremities. If you set to zero with marker, make sure to still visualize and understand the basic setting to zero.
In both setting to zero cases, you will get good accuracy, but with some error due to the lateral movement of the blade. To counter this error, you must perform the fine setting procedure that you will find at the end of the two setting to zero procedures. The fine setting will ensure optimal precision when using other functions of EXACTLENGTH PRO.
Note that setting to zero must be repeated every time that one of the components of the installation is replaced or moved.
Setting to zero basic
This procedure will be executed in the majority of installations when the stop meets to the blade. First, proceed with the installation of the ruler and the adjustment of the stop by following the steps described in the "INSTALLATION" section of the user guide. You can also view the "EXACTLENGTH PRO Installation" video available on our website or on YouTube.
Installation
Once your installation is completed, you are ready to use your EXACTLENGTH PRO ruler for the first time. At this point, it is very important to ensure that your saw is unplugged and in the upright position so that the blade is not in the stop track. In addition, throughout the procedure, make sure to follow and validate the indications of the LCD of your ruler. You may now connect your ruler.
Initialization
At power-up, the ruler will initiate its initialization procedure. Once it completes initialization, press the OK key and the stop will move to its extremity. Make sure all angles of the saw are at zero and stop exceeds the blade by about 1/2 inch, otherwise proceed with the adjustment thereof.
Search for Zero
Press the OK key a second time and the stop will back up about 5 inches to allow the release and lower the saw blade. On first use only, you will be prompted to select the language display which will be stored after your selection. If the ruler has been used before, there will be no language selection choice and the stop will automatically move to the previous zero. To reset the setting to zero, simply press on the "FONCTION" key and the "ZERO" key. The display will then ask you to choose if setting is to be done with a marker. Select "NO" by pressing the (2) key. Now, lower and lock your saw safely with the help of the release of the saw. When you are ready, press on the OK key twice, while following the instructions with care. The stop will move up to the blade to save its position thus completing the setting to zero.
Selection of Fine setting
In this step, you must decide if fine setting is required. The fine setting provides greater accuracy by calculating the error resulting of lateral motion of the saw when the latter is in rest position. To complete the setting to zero with fine adjustment, see the 4th tab "Fine Setting above. If the fine setting is not required, select “NO“ by pressing key (2).
You can now power up the saw and start using your EXACTLENGTH PRO ruler taking into account the safety instructions in the user guide. Note that setting to zero must be repeated every time that one of the components of the installation is replaced or moved.
Setting to zero with a marker
This procedure allows the setting to zero using a marker when the stop cannot or does not have to go to the blade. It is the case when you never cut pieces less than a certain length and want to optimize the capacity of your ruler. The length of the marker must be greater than or equal to the distance between the blade and the end of the ruler. The length of the marker must be greater than or equal to the distance between the blade and the end of the ruler. To ensure the accuracy of the ruler, the length of the marker must be determined to the thousandth of an inch. Note that the procedure for setting to zero with a marker is almost identical to that of the basic setting to zero.
First, proceed with the installation of the ruler and the adjustment of the stop by following the steps described in the section "INSTALLATION" of the user guide. You can also watch the "EXACTLENGTH PRO Installation" video available on our website or on YouTube. For setting to zero with marker, it will not be necessary that the stop exceeds the blade by a half since it cannot reach to the blade.
Installation
Once your installation is completed, you are ready to use your EXACTLENGTH PRO ruler for the first time. At this point, it is very important to ensure that your saw is disconnected and in the upright position. In addition, throughout this procedure, make sure to follow and validate the indications of the LCD of your ruler. Now connect the ruler.
Initialization
At power-up, the ruler will initiate its initialization procedure. Once the initialization is complete, press the OK key and the stop will move to its extremity. Make sure all the saw angles are at zero. Now press the OK key a second time and the stop will back up about 5 inches to allow the insertion of the marker and perform the setting to zero.
Search for Zero
On first use only, you will be prompted to select the language display which will be stored after your selection. If the ruler has been used before, there will be no language selection choice and the stop will automatically move to the previous zero. To reset the setting to zero, simply press on the "FONCTION" key and the "ZERO" key. The display will then ask you to choose if setting is to be done with a marker. Select "Yes" by pressing key (1). The next step is to enter the length of the marker to the nearest thousandth. Then press the OK key and the measurement of the marker will remain in memory.
Lower and lock the saw in a safe manner and place the marker against the blade, between the latter and the stop. If the stop position does not allow correct placement of the marker, use the keyboard arrows to move the stop until the marker can be inserted. Press twice on the OK key following the instructions carefully. The stop will move to the marker to save its position and thus complete the setting to zero.
Selection of Fine setting
In this step, you must decide if fine setting is required. The fine setting provides greater accuracy by calculating the error resulting of lateral motion of the saw when the latter is in rest position. To complete the setting to zero with fine adjustment, see the 4th tab "Fine Setting" above. If the fine setting is not required, select “NO“ by pressing key (2). You can now power up the saw and start using your EXACTLENGTH PRO ruler taking into account the safety instructions in the user guide. Note that setting to zero must be repeated every time that one of the components of the installation is replaced or moved. You can now power up the saw and start using your EXACTLENGTH PRO ruler taking into account the safety instructions in the user guide. Note that setting to zero must be repeated every time that one of the components of the installation is replaced or moved.
Fine setting
WARNING: You must resume the procedure "Setting to zero" appropriately (with or without marker) to access the "Fine setting".
Whenever you perform a setting to zero (with or without marker), you can make fine adjustments to eliminate the error due to lateral movement of the blade. This procedure requires cutting a reference piece whose length will then be validated, which will calculate and record the lateral movement of the blade and taken into account in high-precision cuts.
Cutting the reference piece
By choosing the "Fine Setting" option, the stop is positioned approximately 6 inches from the end of the ruler. Plug the saw, take a work piece (greater than 6 inches long), rest it against the stop and make the cut. Note that for setting to zero with the marker, workpiece length is about 6 inches longer than the distance between the blade and the stop when the latter is at the end of the ruler.
Measurement and adjustment
Once the piece is cut, press the OK key and the stop will backup about two inches. Unplug the saw, then lower and lock it. Place your cut part against the blade (side of the stop), then press the OK key. The stop will move up the track to the cut part and the ruler will precisely calculate its length and record the compensation of the measurement into memory.
Once setting end completed, power up the saw to start using your EXACTLENGTH PRO ruler taking into account the safety instructions in the user guide. Note that setting to zero must be repeated every time that one of the components of the installation is replaced or moved.
Simple, Fast, Exact
EXACT LENGTH PRO in 3 steps
EXACTLENGTH PRO
LED status indicator light
Step 1
Step 2
Step 3
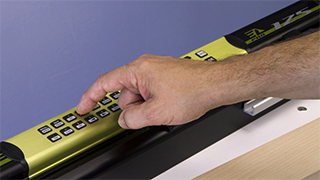
Input
Enter the cutting value on the keyboard
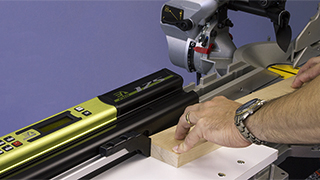
Place
Press the workpiece on the stop.
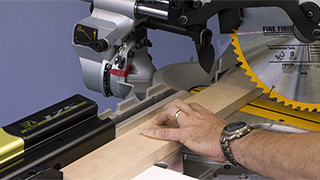
Cut
Make the cut
Red
Orange
Green
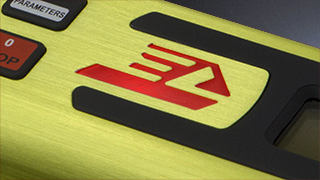
Red
Red indicates that the unit met an obstacle or is in standby mode.
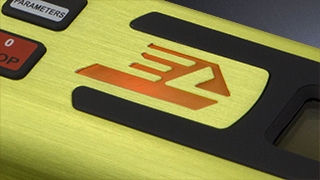
Orange
Orange indicates that the stop is moving or that the unit is in the entering input mode.

Vert
Green indicates that you can make the cut. The stop is then in hold mode and locked.
Exactlength Pro
1165 Lomer-Gouin #1040
Quebec, Qc.
Canada
G1N 1T3
418-682-8383
info@exactlength.com
support@exactlength.com
Click the links below to download PDF
• Download the brochure in French
• Download the brochure in English
• Download the User Guide in French
• Download the User Guide in English
