

Installation
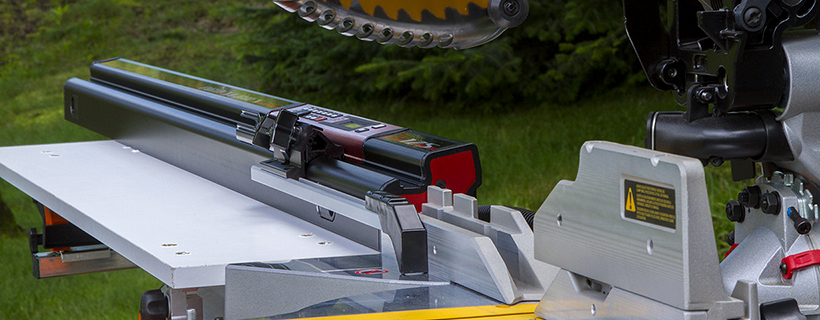
Digital ruler with a motorized stop
Simple, Fast, Exact... Install your EXACT LENGTH PRO rule in a few easy steps.
Before beginning the installation of your EXACTLENGTH PRO ruler, it is important to read the "General Safety Warnings" section found on page 3 of the user guide included with the product. This complete manual can also be viewed or downloaded directly from our website at www.exactlenght.com. All installation instructions and uses for your EXACTLENGTH PRO ruler are also covered more exhaustively in our user guide.
All the necessary materials needed for the installation of the EXACTLENGTH PRO motorized ruler are included with the product. However, you will need the following tools:
• 1 drill
• 1 drill 1/4 inch
• 1 chalk line
• 1 ruler or tape measure
• 1 pencil or marker
• 1 combination wrench 7/16 inch
• 1 Allen key 5/32 inch
CAUTION: Make sure that your saw is not plugged in. In addition, the table on which you plan to install the ruler must have at least the same length as the latter and must exceed the backplate of the saw by at least two inches.
Before starting the installation, be sure that the surface of the mounting table is at the same height as the deck of your saw. To attach the ruler quickly and easily to your work table, it is equipped with a T-Slot to accept 1/4-inch in diameter bolts provided with the product. The centre of this groove is at the exact distance of 1 inch from the facade of the ruler.
Attach the rule to your table
With the help of a chalk line or a long ruler, make a line on your table corresponding with backplate of the saw. This line will mark the location of the facade of the ruler. Then draw a second line precisely one inch behind the first, which will become our installation line. This line also corresponds to the centre of the T-slot of the ruler.
Then, simply drill four holes with a 1/4 inch drill bit on your installation line. The holes must be at equal distance to balance the fastening of the ruler and must be at least 8 inches from the ends of the ruler so that the bolts are not opposite the controls.
The four bolts, included in the package, must now be slid inside the groove and inserted into the four previously drilled holes. All that needs to be done now is to secure ruler tightly to your work table using the nuts and washers. Make sure that the facade of the ruler is properly aligned with the backplate of the saw and that its extremity is as close as possible before you tighten the nuts using the 7/16 inch combination wrench.
Adjust the stop
Once the ruler is secured, the next step is to install and adjust the stop. First assemble the stop that includes the lock and the adjustment bar. To do this, simply slide the two nuts in the adjustment bar. Be sure to insert the bar on the correct side according to your ruler. The plastic end of the adjustment bar should point toward the saw. The bolts must be only slightly tightened because later in the procedure, the position of the bar must be adjusted depending on the location of the blade of the saw.
the lock in order to correctly position the stop. Once the lock is positioned in the slot, tighten the two tightening handles. There is no advantage to over tighten the handles. Also make sure that your saw is unplugged and in the upright position so that the blade is not in the stop rail.
Ajuster la butée
Your EXACTLENGTH PRO ruler is now ready to be used for the first time. At power-up, the ruler will initiate its initialization procedure. Once it completes initialization, press the OK key and the stop will move to the end of the ruler. Check if all the saw angles are zero. Adjust your stop by first loosening the adjustment bolts and sliding it until it exceeds the blade by about 1/2 inch. IMPORTANT: If the stop does not exceed the blade, it will be difficult to do correctly the setting to zero. If so, the setting to zero with a marker must be carried out. Once the stop is well adjusted, tighten the stop adjustment bolts with the 5/32 inch Allen key.
During the installation, it is important to follow these recommendations:
• At no time the stop must serve as reinforcement or structure for your table. This could damage the ruler or prevent it from working well.
• Adjust the ruler as close as possible to your saw. There should not be any free space between the deck of your saw and the ruler.
• Align the ruler with the backplate of the saw. A bad adjustment may affect the accuracy of the ruler.
• Use a minimum of four anchor bolts so that the ruler is firmly attached to your work table. For a ruler over 8 feet, use an extra bolt for each 2 additional feet.
Voila, your EXACTLENGTH PRO ruler is installed. You are now ready to follow the procedure of "Setting to zero". “To do this, watch the "Setting to zero" video EXACTLENGTH PRO series.” You can also refer to the user guide in the section "Setting to Zero" or refer to the section "Setting to ZERO" on the "PRODUCTS" page of our Web site. "
Simple, Fast, Exact
EXACT LENGTH PRO in 3 steps
EXACTLENGTH PRO
LED status indicator light
Step 1
Step 2
Step 3
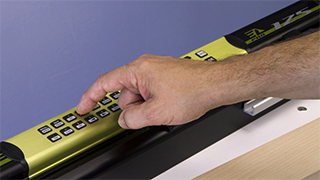
Input
Enter the cutting value on the keyboard
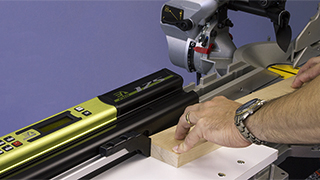
Place
Press the workpiece on the stop.
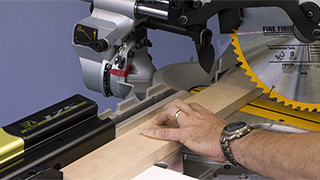
Cut
Make the cut
Red
Orange
Green
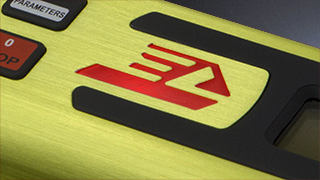
Red
Red indicates that the unit met an obstacle or is in standby mode.
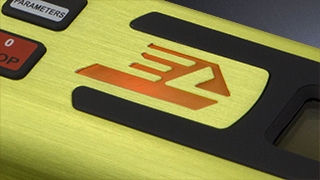
Orange
Orange indicates that the stop is moving or that the unit is in the entering input mode.

Vert
Green indicates that you can make the cut. The stop is then in hold mode and locked.
Exactlength Pro
1165 Lomer-Gouin #1040
Quebec, Qc.
Canada
G1N 1T3
418-682-8383
info@exactlength.com
support@exactlength.com
Click the links below to download PDF
• Download the brochure in French
• Download the brochure in English
• Download the User Guide in French
• Download the User Guide in English
